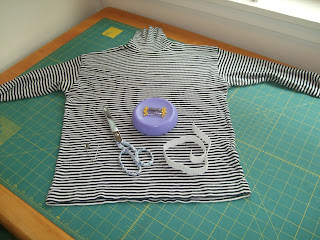
I made my daughter a pair of leggings for the first time when she was about 2 months old. At that point in my life trips to the fabric store were a rare luxury, so I decided to start cutting up old t-shirts! I have made her tons of leggings since both from scratch and from old t-shirts, here is my method...
You will need:
-An old KNIT shirt
-A pair of leggings to copy
-Sewing machine
-Elastic (3/4'' wide)
-A large piece of paper
-Scissors
-Pins
-Safety pin
-Serger (not necessary)
1) First you need a pattern, I sometimes create patterns from scratch and sometimes I start by copying an existing garment.
2) Draw 2 perpendicular lines on a large sheet of paper.
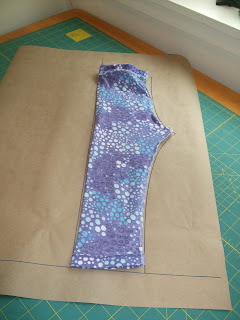
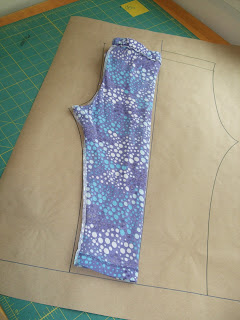
3) Fold your leggings inside out with one leg inside the other and carefully place them on one side of the line with the folded edge touching the center line. Trace the side of the leggins. The center front and center back of the leggings are different heights so make sure to mark the correct spot. Also be sure to stretch the elastic waist out to get the true size.
4) Connect the top points and add 1'' to the top.
5) Repeat on the other side. The taller side is the Center back.
6) Now your pattern is finished! So cut it out.
7) Lay out the shirt making sure that the bottom is lined up. Pin the pattern down make sure the bottom of the pattern is lined up right on the bottom, you will not need to cut this part. Cut out around the rest of the edges.
8) Remove the pattern and fold each leg right sides together. the inseams should mach up perfectly and the top part should not.
9) If you are lucky enough to have a serger, serge the two inseams together. If not a regular sewing machine works fine just use a subtle zig zag stitch instead of a straight stitch, otherwise the seams will snap since they can not stretch.
10) Fold one leg right side out and put it inside the other leg (right sides should be touching)
11) Serge or zig zag the U seam. Turn the leggings right side out they are almost done!
12) Turn the leggings inside out and fold the top over 1'' and press. Stitch down the top with a wide zig zag stitch leaving 1'' open at the center back
13) Attach a large sturdy safety pin to the end of 3/4'' wide elastic (the elastic should be 1'' smaller then the child's waist). Use the safety pin to pull the elastic through the casing you just created. make sure there are no twists in the elastic, overlap the ends and stitch together securely.
14) Pull the elastic inside the casing and zig zag closed the opening. Turn right side out... YOU'RE DONE!
Now make another pair!


Great instructions!! I like the pictures along with the instructions because I often have a hard time with just written directions. I'll use this to make my own legging patterns, since I don't have any kids, you know. :)
ReplyDeleteAmy you are brilliant! I wish you much success with your blog. I just have one suggestion- maybe you could also show them how to add a seam allowance and use this pattern to make leggings from scrap material or the amount of fabric they would need to make one from scratch.
ReplyDeleteAnyway- I think this blog is awesome!
Auntie-Sharon
Hi, thanks auntie! :-)
DeleteI'm a fan of your blog!
ReplyDeleteAnd of patterns (and with pictures!).
I'll make MANY of these, i'm pretty sure.
After SUP though.
Cheers!
Heather
Thanks Heather!!!!!
ReplyDeleteThank you for sharing this tutorial. I will try it out this weekend.
ReplyDeleteThanks.
I just finished making a pair for my daughters Foofa costume. This is by far the easiest pair of pants I have ever sewn. Your directions and pictures were so clear that I finished the leggings in not time. Thanks so much!
ReplyDelete